PingItNow connects Stripe and Whop checkout to a customizable thank-you page where your tracking scripts can run after a verified payment. Use your existing analytics, advertising, or attribution provider; PingItNow is not limited to Hyros and is not affiliated with the providers mentioned in this guide.
The usual journey is your website → Stripe or Whop checkout → your PingItNow thank-you page → optional next step. Keep your provider's tracking installed on your website to capture visits before checkout. The thank-you page supplies the purchase context that can connect a buyer to that earlier visit. Identity matching and final attribution depend on the provider, consent, browser restrictions, and your domain configuration.
This guide describes the current application. Screenshots labeled Demo show real application screens with simulated data; they do not represent live revenue or connected merchant accounts.
Get started and explore the demo
- Open PingItNow and use the site's sign-up option to create your account, or sign in to your existing account.
- For a walkthrough before connecting accounts, open the interactive demo.
- Navigate between the demo's dashboard, payment links, thank-you pages, transactions, domains, recovery, and settings screens.
- The Demo: On indicator and Sample data · Demo mode banner identify simulated activity. Demo settings and transactions do not contact payment services or charge a customer.
- Use the real dashboard to configure your own account. A connected status inside the demo does not connect your real Stripe or Whop business.
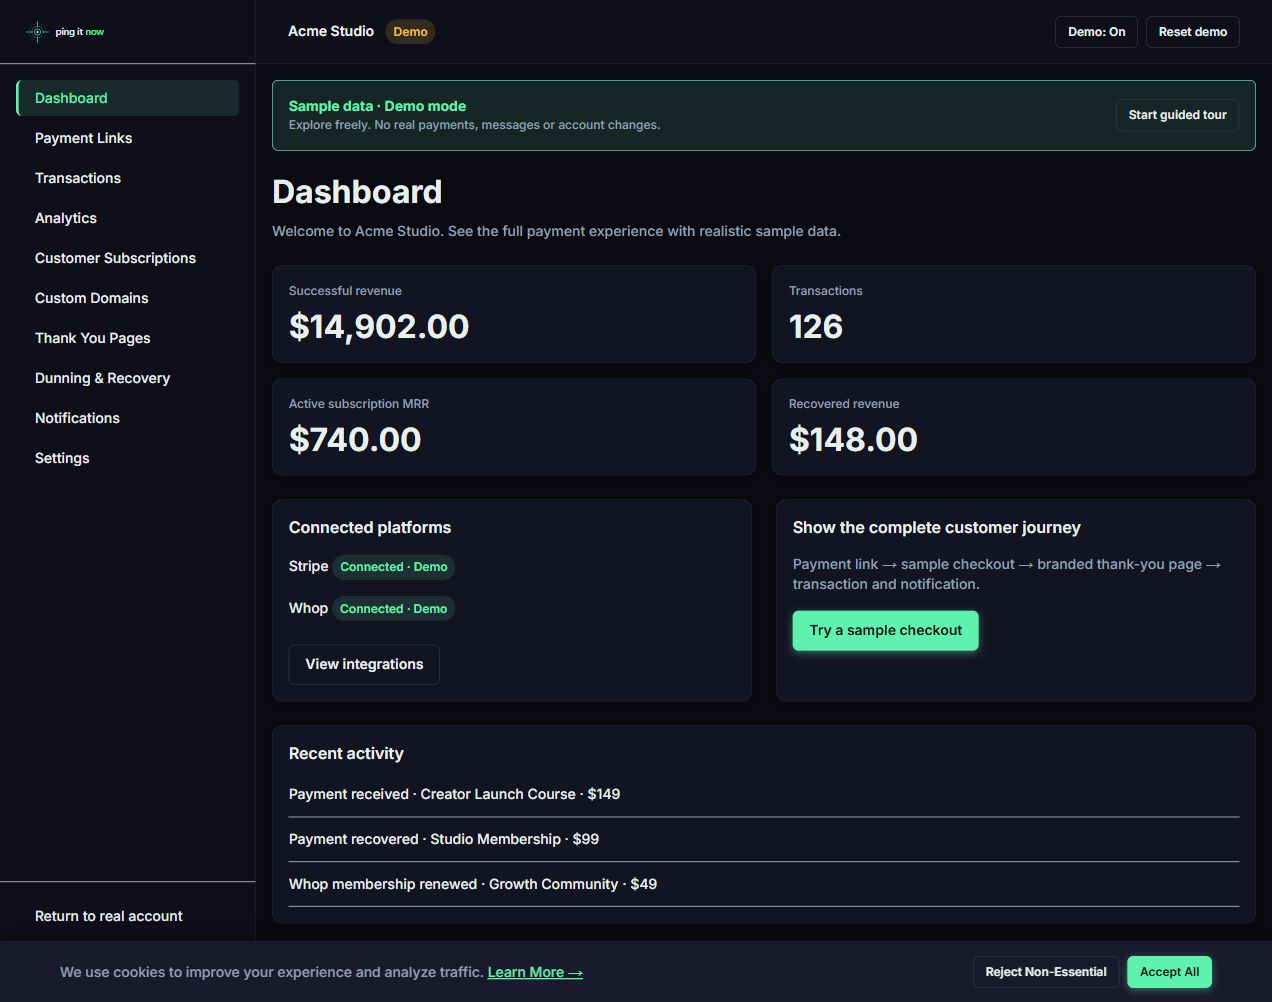 The interactive demo overview with its sample-data banner · Select to enlarge
Your first setup
Complete these steps in order:
- Connect Stripe or Whop in Settings → Integrations.
- Optionally add and verify a domain in Settings → Domains.
- Save a supported script in Settings → Tracking.
- Create or import a payment link and select its thank-you-page domain and template.
- Open its checkout using View Link → and verify a payment in a suitable test environment.
- Check Attribution diagnostics, then confirm the purchase in your tracking provider.
Connect Stripe
- Open Settings → Integrations and select Stripe.
- Click Connect with Stripe.
- Sign in on Stripe's authorization page and select the merchant account you intend to use.
- Review Stripe's requested access and authorize the connection.
- Return to PingItNow. The integration should show Account Connected and the connected account identifier.
- Open Payment Links to create a new link or explicitly import existing links.
Stripe uses OAuth. You do not enter your Stripe password into PingItNow. Connecting an account alone is not proof that every existing link redirects correctly; review the links you create or import and their synchronization status.
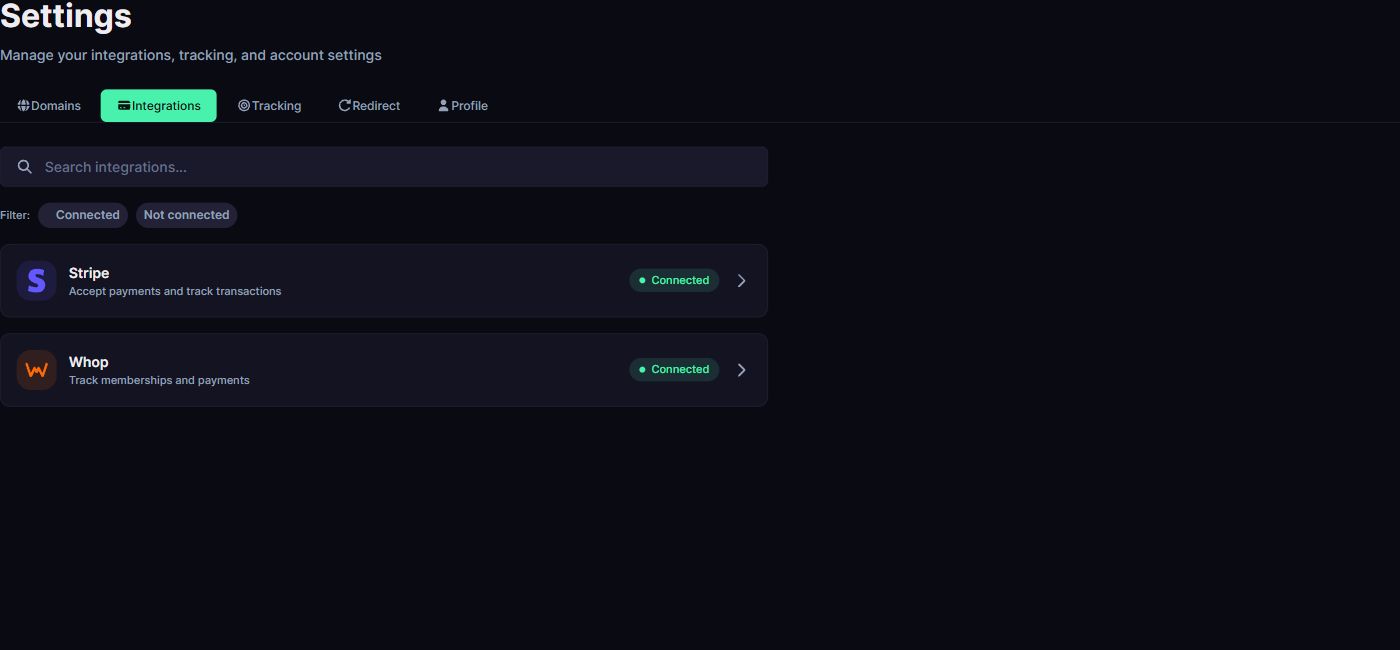 Settings integration list showing where to open Stripe · Select to enlarge
The integration list identifies the Stripe entry. Open that entry to access its connection controls; this capture does not show the OAuth authorization flow.
If the panel shows Connection Expired, click Reconnect with Stripe, authorize the correct merchant account again, and review Attribution diagnostics → Checkout redirect synchronization. Avoid distributing a link while its redirect synchronization reports an error.
Connect Whop
Whop requires a Company API Key and a Webhook Signing Secret from the same business. Use the business that owns the plans you want to sell.
- In Whop, open that business's Developer dashboard. The generic developer link may require selecting a business first.
- Create a Company API Key. If Whop offers inherited or custom permissions, choose the permissions needed for your intended actions.
- Enable the permissions listed in PingItNow's setup panel:
| Area | Permissions shown by PingItNow |
|---|---|
| Business | Read business information |
| Products | Read products, Create products, Delete products |
| Plans | Read plans, Create plans, Delete plans |
| Members | Read members, member:email:read |
| Checkout | checkout_configuration:create |
| Payments | Read payments |
The checkout permission is necessary to generate a checkout with the return URL configured. Member email access is necessary when buyer identity must be retrieved from Whop. Read-only permissions can make the connection appear usable while checkout creation still fails.
- In PingItNow, open Settings → Integrations → Whop and paste the key into API Key.
- Copy the exact webhook endpoint shown by PingItNow's Configure Webhook section. Use the endpoint for the environment you are configuring; production and QA are different destinations.
- In the same Whop business, create a webhook for that endpoint and select
payment_succeededandmembership_activatedin the dashboard event picker. Whop's picker uses underscores, while delivered webhook payloads use the corresponding dotted event types,payment.succeededandmembership.activated, handled by PingItNow. These are two naming formats for the same events; do not change the payload format. Whop's official integration guide explains the dashboard-versus-payload naming distinction. - Copy its signing secret into Webhook Signing Secret in PingItNow.
- Click Connect Whop.
- Confirm Account Connected and Webhook configured, then test an actual checkout flow.
The Whop entry appears in the same Settings → Integrations list shown above. Open it to access the API-key and webhook setup fields. The screenshot shows navigation, not the credential setup form.
Use Update next to the webhook secret field when rotating the secret. Update the value to match Whop's current webhook configuration. Never put API keys or webhook secrets into screenshots, public documentation, payment URLs, or tracking snippets.
For an imported Whop plan, distribute the View Link → provided by PingItNow. An unrelated original Whop plan URL may not carry PingItNow's checkout redirect configuration.
Add a custom domain
A custom domain makes the thank-you page part of your own brand. When a provider uses first-party cookies, a suitable domain can help it recognize visitors from your website. A domain alone does not guarantee identity continuity; check your provider's cookie and tracking configuration.
- Open Settings → Domains.
- Click Add Domain.
- Enter a hostname, such as
pay.example.com, in Domain Name. Enter the hostname withouthttps://, a path, or query parameters. - Click Add Domain.
- At the DNS provider for
example.com, add the CNAME record displayed by PingItNow. For the example above, the application currently displays:
| DNS field | Example value |
|---|---|
| Type | CNAME |
| Name | pay |
| Value | data.pingitnow.com |
- Allow DNS changes to propagate, then click the domain's Verify domain action.
- Wait for Verified before selecting the domain for a live payment link.
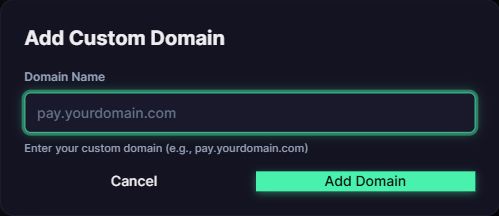 Add Custom Domain form with an empty hostname field · Select to enlarge
Enter the hostname you own; the placeholder is an example, not a configured domain.
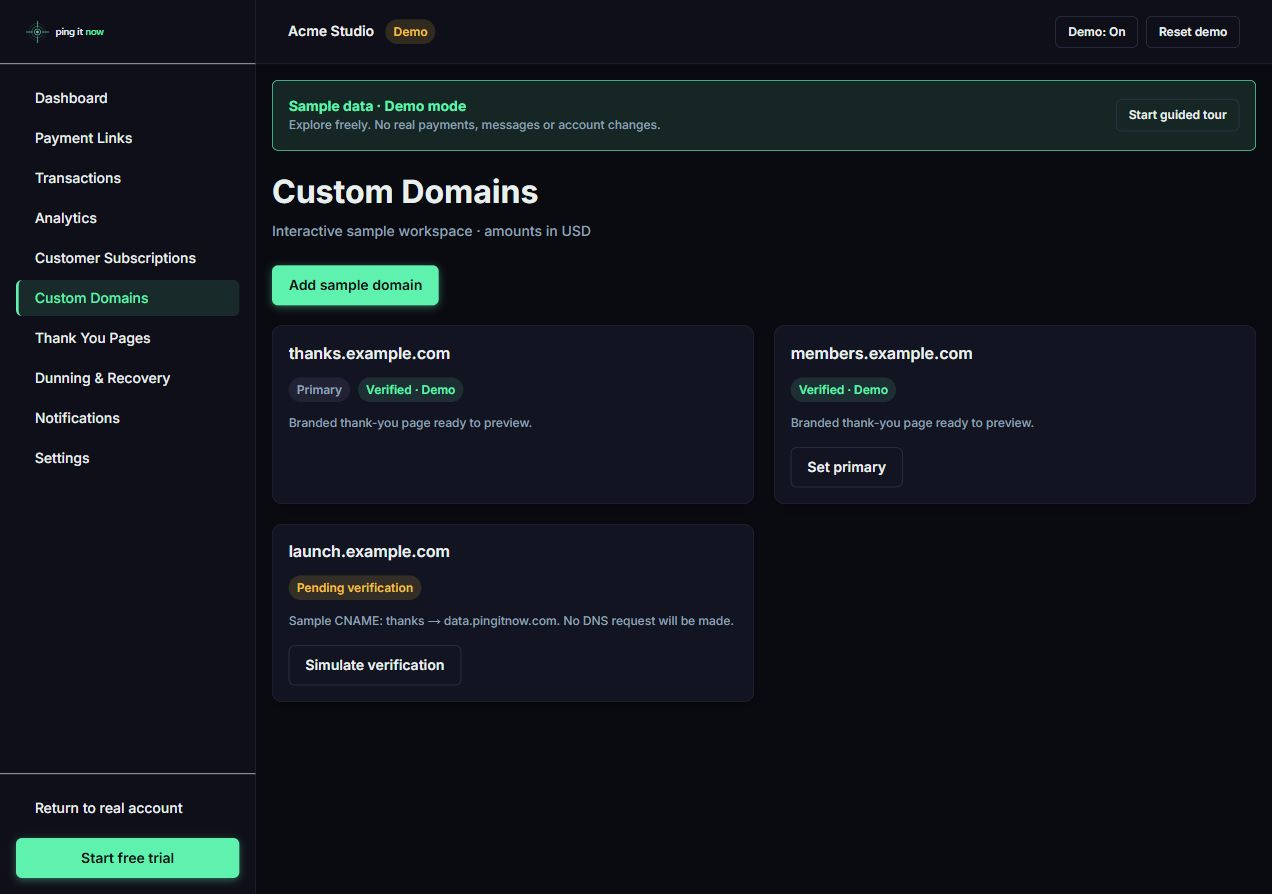 Custom domains in Demo mode with simulated verification · Select to enlarge
Demo illustration: the sample domain controls simulate verification and do not change DNS. Follow the Settings → Domains instructions above for your real domain.
Use a subdomain if your DNS provider does not support CNAME records at the root. Follow any additional ownership verification requirement returned by the hosting service; contact support if the app does not display enough information to finish verification.
Domain settings
Click Edit settings on the domain to configure its Domain-Specific Tracking Script and redirect behavior. Leave the tracking field empty to inherit the global tracking script from Settings → Tracking. Domain-level tracking overrides the global setting; it does not automatically append to it.
The domain card reports Tracking: Custom or Using Global, and Redirect: Using Global, a delay, or Disabled. Set as primary marks your preferred domain, but still check the domain selected on each payment link. Deleting a domain can affect links that use it; update those links first.
Configure tracking scripts
- Obtain the official installation snippet from your analytics, advertising, or attribution provider.
- Open Settings → Tracking.
- Paste it into Tracking Scripts.
- Click Save Changes.
- Open Attribution diagnostics and click Check tracking scripts.
- Verify a paid checkout and inspect the event in the provider's own dashboard.
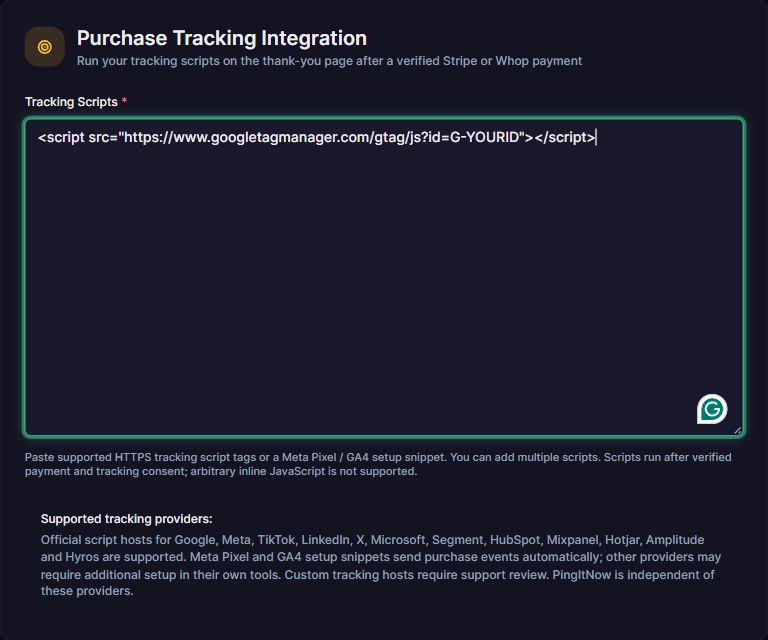 Tracking settings with an illustrative unsaved configuration · Select to enlarge
The editor shows a generic example for illustration. Replace it with your provider's own valid identifier and save your configuration before testing.
What is supported
PingItNow's purpose is to run supported tracking integrations on the post-payment thank-you page, regardless of whether you use Hyros. Compatibility has three distinct levels:
| Configuration | Current behavior |
|---|---|
| Meta Pixel configuration snippet with a pixel ID | Loads Meta and dispatches a configured Purchase with purchase value, currency, and an event identifier |
| GA4 configuration snippet with a measurement ID | Loads the Google tag and dispatches a configured purchase with transaction ID, value, and currency |
| Recognized Hyros tracking script | Loads the provider with verified buyer and purchase context; final attribution is checked in Hyros |
| Approved external HTTPS script from another supported host | Loads that script; whether it detects or sends a purchase depends on that provider's integration |
The approved host list currently covers Google, Meta, TikTok, LinkedIn, X, Microsoft, Segment, HubSpot, Mixpanel, Hotjar, Amplitude, and Hyros. Being on this list does not imply a built-in purchase-event adapter for every provider. A Google Tag Manager container still needs the appropriate tags and triggers configured in Google; loading it does not create those settings for you.
Only supported <script> configurations are accepted. You can configure multiple supported script tags in the same field. Arbitrary inline JavaScript is not executed. Extra HTML, image tags, event handlers, unapproved hosts, and unsupported inline snippets are rejected. For example, omit the <noscript> image from a Meta installation snippet. Scripts are limited to 10,000 characters.
If your provider uses a custom hostname or needs its own purchase callback, ask support to verify compatibility before going live. Do not assume that loading the script alone sends your desired conversion event.
Copy-paste configuration examples
These examples use placeholder identifiers. Replace every example ID with the ID from your own provider account before saving. They are PingItNow configurations for the thank-you page, not installation instructions for arbitrary websites. You can place multiple supported tags in the same Tracking Scripts field.
Meta Pixel with automatic purchase dispatch: replace 123456789012345 with your numeric Pixel ID.
<script
  src="https://connect.facebook.net/en_US/fbevents.js"
  data-pingitnow-provider="meta"
  data-pixel-id="123456789012345"
></script>
PingItNow initializes that pixel and invokes its configured Purchase after payment verification and consent. Do not add a second manual purchase event for the same payment. Check the resulting event in Meta's event tools.
GA4 with automatic purchase dispatch: replace G-ABC1234567 in both locations with your GA4 Measurement ID.
<script
  src="https://www.googletagmanager.com/gtag/js?id=G-ABC1234567"
  data-pingitnow-provider="ga4"
  data-measurement-id="G-ABC1234567"
></script>
PingItNow configures that measurement ID and invokes purchase with the verified transaction ID, value, and currency. Confirm the event in GA4. Use the same measurement ID in the URL and the configuration attribute.
Google Tag Manager external container script: replace GTM-ABC1234 with your container ID.
<script src="https://www.googletagmanager.com/gtm.js?id=GTM-ABC1234"></script>
This loads an approved external script. It does not create your Google-side tags or triggers, run arbitrary inline container bootstrap code, or automatically emit a purchase data-layer event for the container. Configure and validate the container's own initialization and triggers with your tracking specialist. Prefer the GA4 configuration above when you need PingItNow's built-in GA4 purchase adapter.
Consent, buyer identity, and URL parameters
The thank-you page verifies the payment before using its buyer information. Tracking requires the visitor's tracking consent; declining consent prevents tracking dispatch. Preview and demo screens do not produce a real purchase event.
For the existing Hyros-compatible buyer identification flow, the verified buyer email is exposed as he in the thank-you-page URL after consent. The application does not add a duplicate email parameter. This is a provider-specific compatibility detail, not a requirement to use Hyros.
UTMs already present in the thank-you-page URL remain available. Do not assume Stripe forwards arbitrary custom checkout URL parameters such as fbc_id or h_ad_id. Keep your provider installed on the pages customers visit before checkout so it can capture the original visit. PingItNow does not currently add an intermediate click-tracking link or guarantee recovery of parameters a checkout provider discards.
Create a Stripe payment link
- Open Payment Links and click + Create Payment Link.
- If both payment providers are connected, select Stripe.
- In Create Stripe Payment Link, enter Link Name. This is your internal label.
- Choose a product and price from Existing Products, or choose + Create new product.
- For a new product, enter Product Name, select One-Time or Recurring, and enter the price and currency. Product Name is shown to the customer.
- For a recurring price, configure Billing Period and, if needed, Free Trial Period (Optional). A trial is not the same as an immediately paid purchase; test your intended conversion behavior.
- Select Custom Domain: Shared (pingitnow.com) or a verified domain you own.
- Select Thank You Template, and optionally fill TY Headline (Optional) and TY Message (Optional).
- Review the optional checkout and advanced settings. Use tax and terms-of-service options only when the corresponding Stripe account configuration is ready.
- Click Create.
- Open View Link → on the created row to inspect checkout. Verify redirect synchronization and a complete purchase before sharing the link.
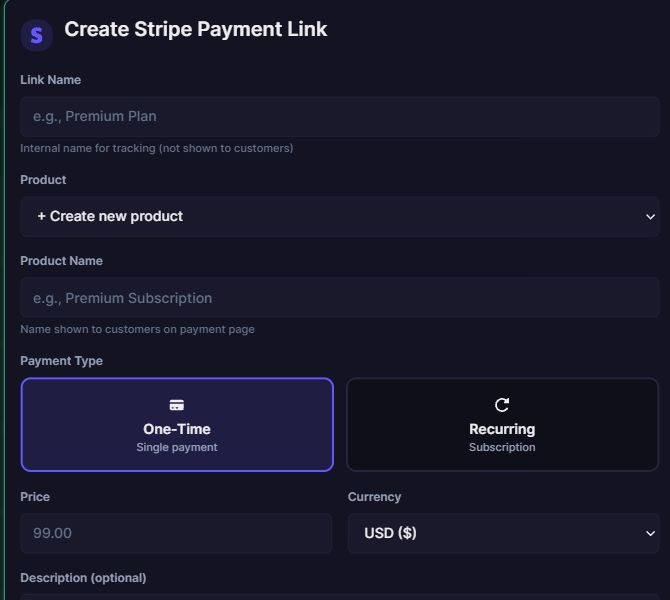 Stripe payment-link creation form · Select to enlarge
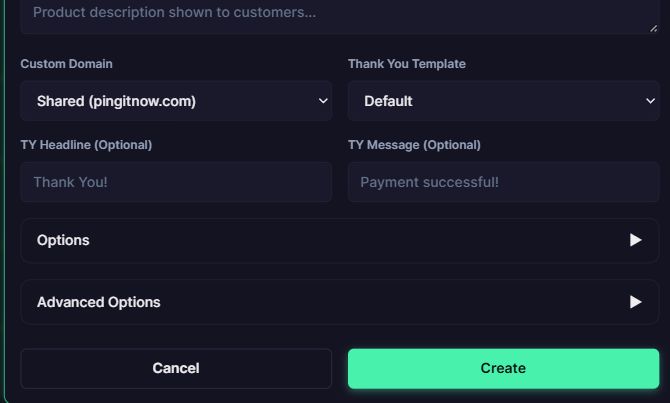 Stripe creation form: domain, thank-you template, optional text, and Create button · Select to enlarge
Choosing an existing price uses that price's billing behavior. Changing a PingItNow label or thank-you message does not change the underlying checkout price.
Create a Whop checkout link
- Open Payment Links → + Create Payment Link and choose Whop, if prompted.
- In Create Whop Checkout Link, enter the internal link name and the customer-facing title.
- Under Plan Type, choose Free, One-Time, or Recurring, then complete the applicable amount, currency, and billing-period fields.
- Select a verified Custom Domain, or use the shared domain.
- Select Thank You Template and optionally customize the headline, message, and description.
- Review the optional settings displayed by the form. Whop's custom checkout questions support text fields in this application.
- Click Create Checkout Link.
- Use that row's View Link → to open the checkout with PingItNow's return configuration.
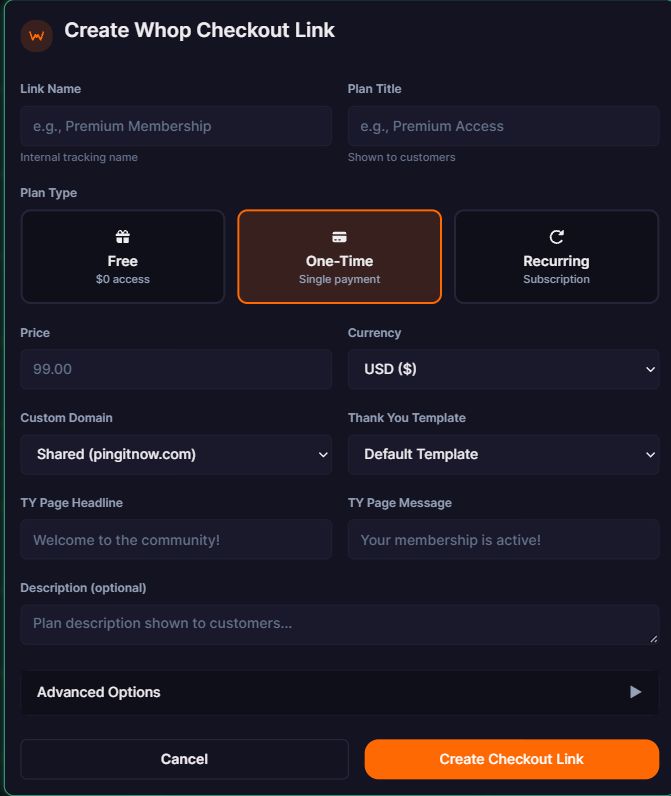 Whop checkout creation form before saving · Select to enlarge
The form shows an unsaved configuration. Complete the fields for your own offer and create the checkout link before sharing it.
A free plan is not evidence of a paid conversion. Configure and test the behavior appropriate to your offer. If checkout reports a permissions error, enable checkout_configuration:create on the Company API Key for the same Whop business.
Import existing links and plans
Stripe
- Open Payment Links → Import and select Stripe, if prompted.
- Review Import Payment Links. Already imported links are excluded from the new-link list.
- Check the links to import. Use the top checkbox to select or deselect the displayed list.
- For each selected link, choose the shared domain or a verified custom domain for its Thank You Page URL.
- Review the confirmation and import the selected links.
- Return to Payment Links, inspect the links, and verify checkout redirect synchronization.
Importing configures the post-payment destination on the selected Stripe links. This can change where existing customers are sent after completing checkout; choose the destination deliberately.
Whop
- Open Payment Links → Import and select Whop, if prompted.
- Review Import Whop Plans and select the plans you want.
- Choose a shared or verified custom thank-you-page domain for every selected plan.
- Click Import … Selected Plan(s), review Confirm Import, and click Yes, Import.
- Use the imported rows' View Link → when distributing your checkout URLs.
Import results can be partial. Read the reported imported and failed counts, fix the failed items, and retry only those items. Do not interpret a partial import as success for every selected plan.
Edit, rename, preview, and delete
Use a payment-link row's Edit button to change its internal name, domain, thank-you-page template, headline, or message. The application reports whether checkout synchronization succeeded or whether an update needs attention. Review synchronization errors in Attribution diagnostics.
Use the rename control for an internal label change. Click the thank-you-page URL or Preview TY Page to inspect its appearance. Preview mode disables tracking and automatic redirects; it does not prove a purchase event was sent.
Use Delete only after reviewing its confirmation and any option to archive on the payment platform. Removing a PingItNow record and archiving a provider's offer are different actions. Check the confirmation before affecting a live offer.
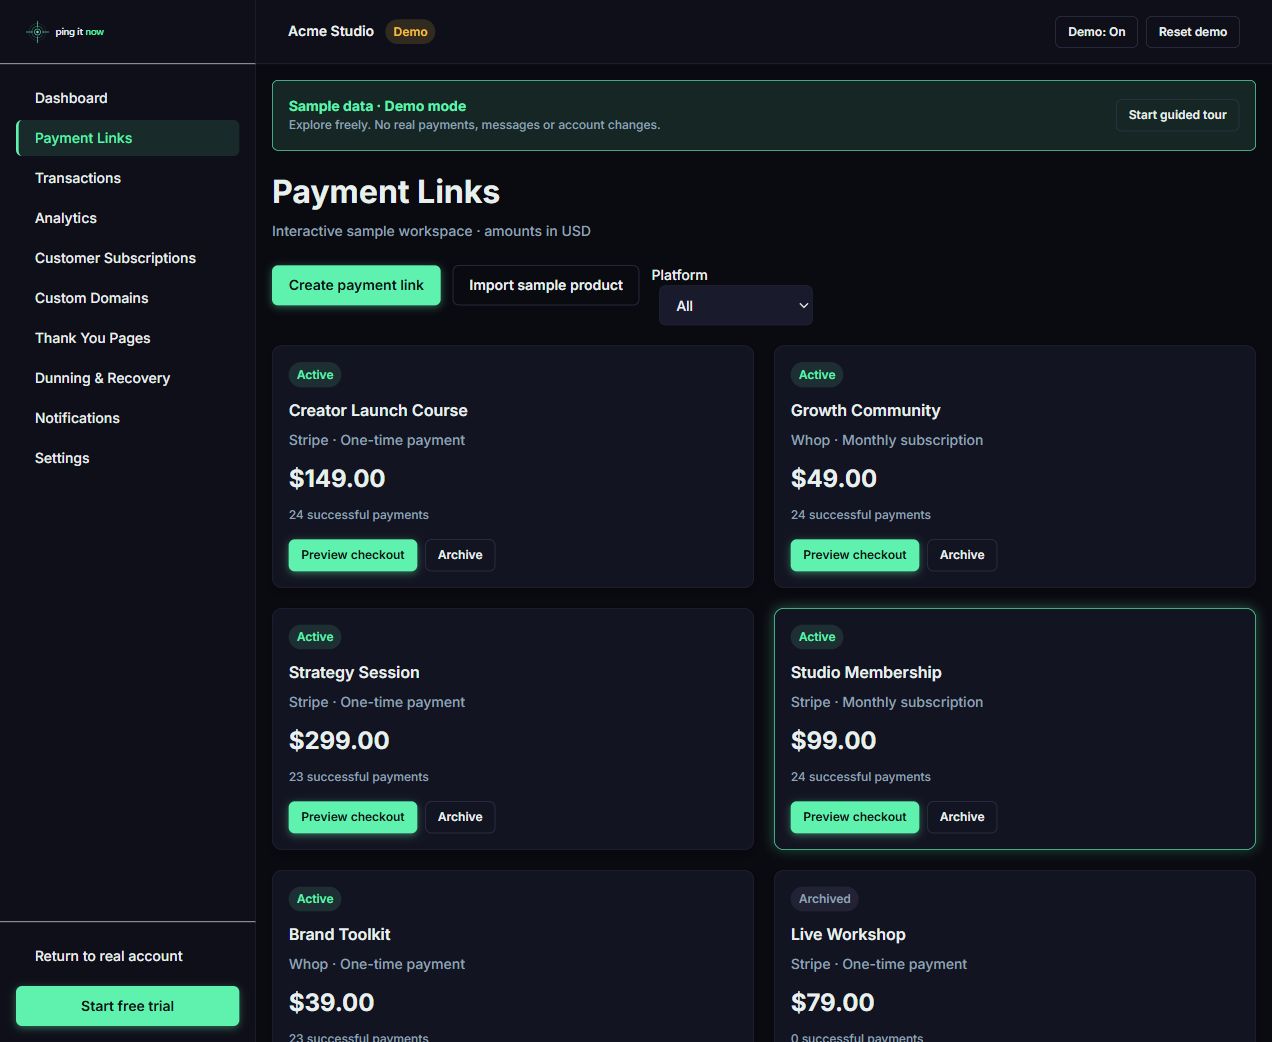 Payment-link list in the simulated demo · Select to enlarge
Customize your thank-you page
- Open Thank You Pages to browse Thank You Page Templates.
- Click Preview Template to inspect a design, then Back to Templates to return.
- Select the template when creating or editing a payment link.
- Set the link's optional headline and message to match your offer.
- Preview that specific link's thank-you page from Payment Links.
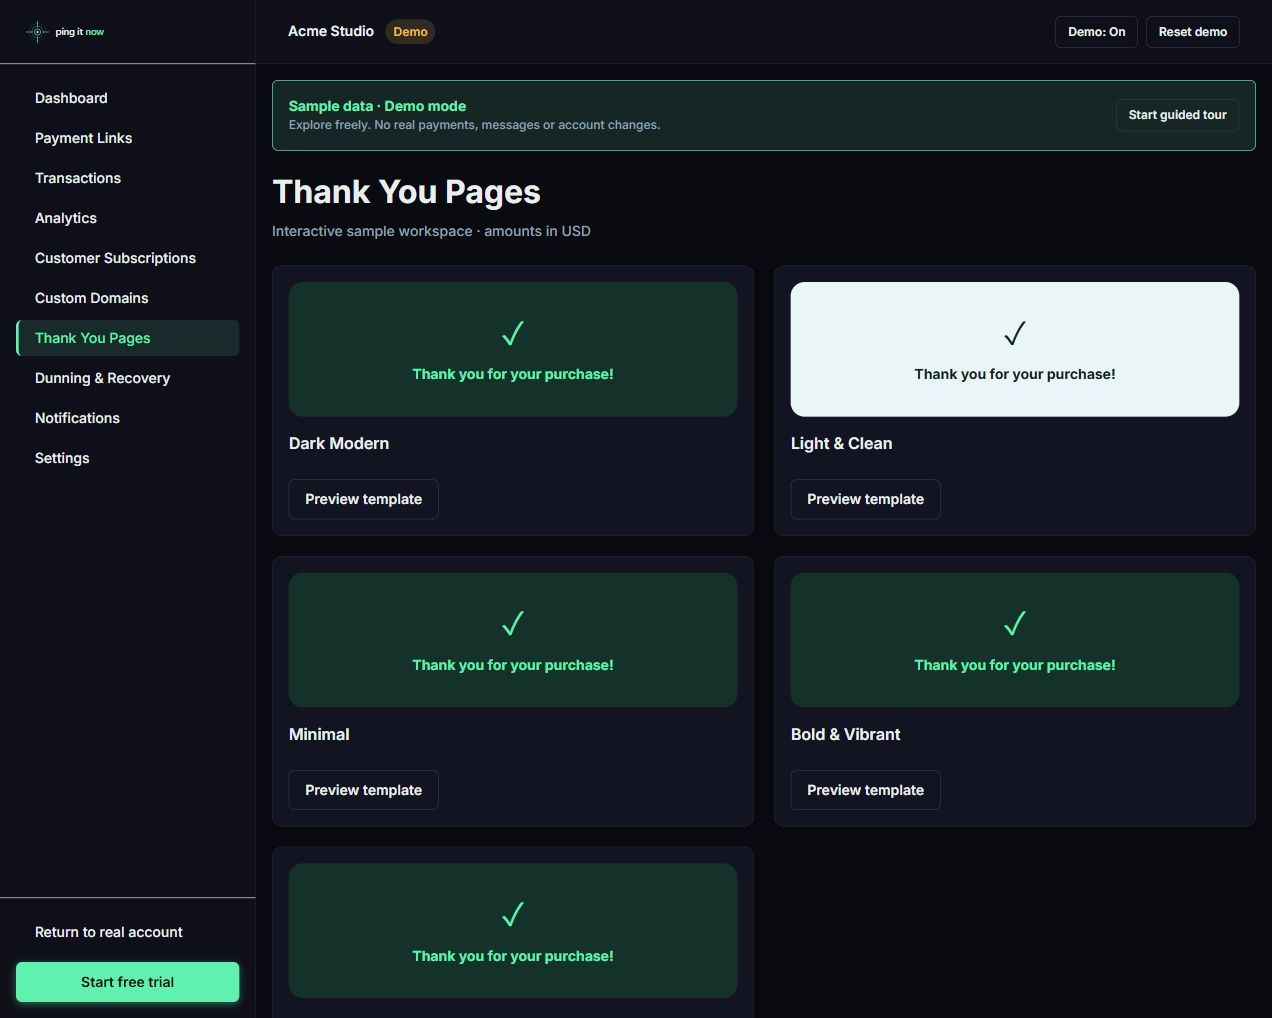 Thank-you-page template library in Demo mode · Select to enlarge
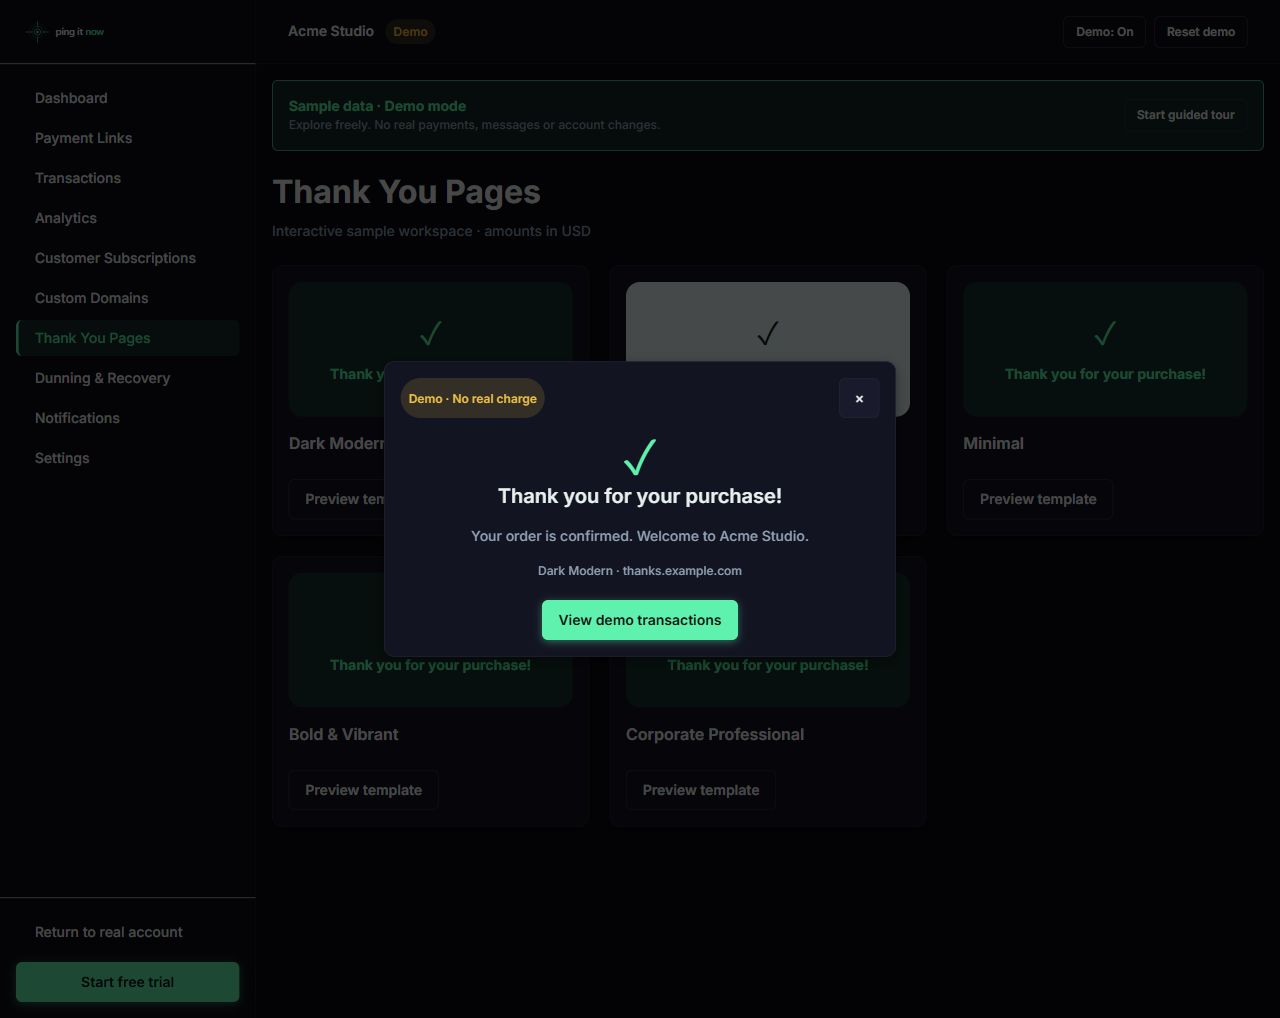 A simulated thank-you-page preview in Demo mode · Select to enlarge
The template gallery currently provides system templates. A template preview is a design preview, not a confirmed transaction. Live checkout verifies the buyer and payment before displaying purchase data and dispatching tracking.
Configure the next-step redirect
- Open Settings → Redirect.
- Enable Enable automatic redirect after payment.
- Set Wait Time (seconds) between 1 and 60.
- Enter the full Redirect URL, such as
https://example.com/welcome. - Click Save Changes.
- If a domain has its own redirect setting, review Settings → Domains → Edit settings. It can inherit the global configuration or override it.
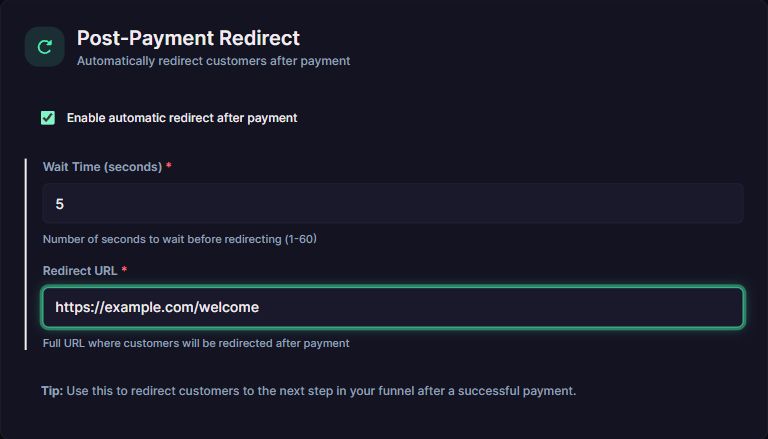 Redirect settings with an illustrative destination · Select to enlarge
The example destination is illustrative. Enter your own next-step URL and save it for your customers.
Allow enough time for the thank-you page and tracking process. The application coordinates the redirect with tracking readiness; a preview intentionally does not redirect. Verify the complete browser journey with the same consent behavior your customers will encounter.
Verify an end-to-end purchase
Use your payment provider's appropriate test environment before accepting real payments. The interactive demo does not replace this check, and a live checkout can charge a real card.
- Visit your normal landing page with your tracking provider installed, using a recognizable test campaign if needed.
- Open the payment link from PingItNow's View Link →.
- Complete the checkout in the intended payment-provider environment.
- Confirm that the browser lands on the correct thank-you-page domain and design.
- Accept tracking consent if your test is intended to send a tracking event.
- Open Attribution diagnostics in PingItNow. Check integration readiness, verified domains, checkout redirect synchronization, and recent purchase tracking.
- Click Check tracking scripts to test saved-script availability without sending another buyer or purchase.
- In your provider's own dashboard, verify the buyer identity when supported, transaction identifier, purchase value, currency, and campaign attribution.
- Confirm the purchase appears in Transactions and that the payment platform delivered its webhook successfully.
Script available means the script endpoint passed the availability check. Dispatched means the browser loaded the integration and invoked its configured event. Neither is proof that the provider accepted the purchase or attributed it to the right campaign. The provider's event tools and dashboard are the final check.
Refreshing a paid thank-you page should not be used as a routine way to resend conversions. PingItNow includes duplicate protection; diagnose a missing conversion before attempting a replay.
Use the dashboard
| Screen | What to use it for |
|---|---|
| Dashboard | Review account activity and follow setup prompts |
| Payment Links | Create, import, edit, preview, and distribute provider checkout links |
| Thank You Pages | Browse and preview system templates |
| Transactions | Review recorded payments and use the filters available on the screen |
| Analytics | Inspect the payment and revenue reporting available in your account |
| Attribution diagnostics | Check setup, redirect synchronization, script availability, and recent browser dispatches |
| Customer Subscriptions | Review subscription states such as Active, Trialing, Past Due, and Canceled |
| Dunning | Review failed-payment recovery and its settings |
| Settings | Configure integrations, domains, tracking, redirects, and your profile |
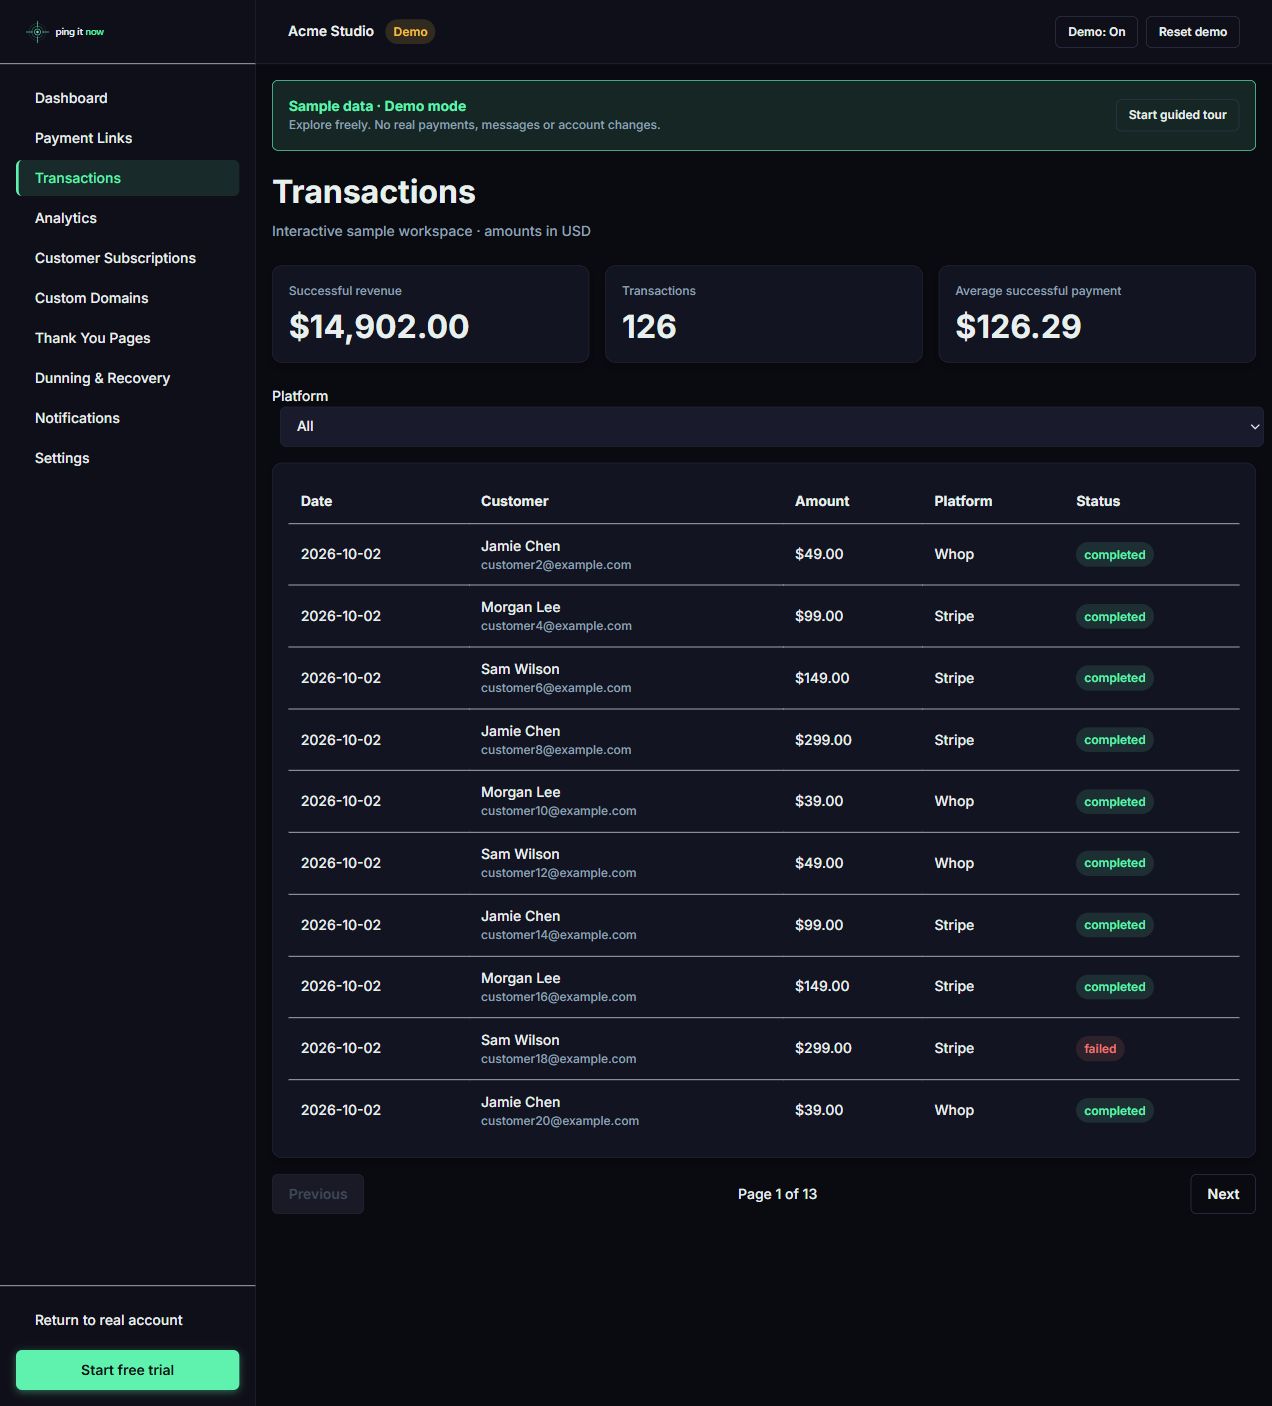 Transactions screen in Demo mode with fictional customer data · Select to enlarge
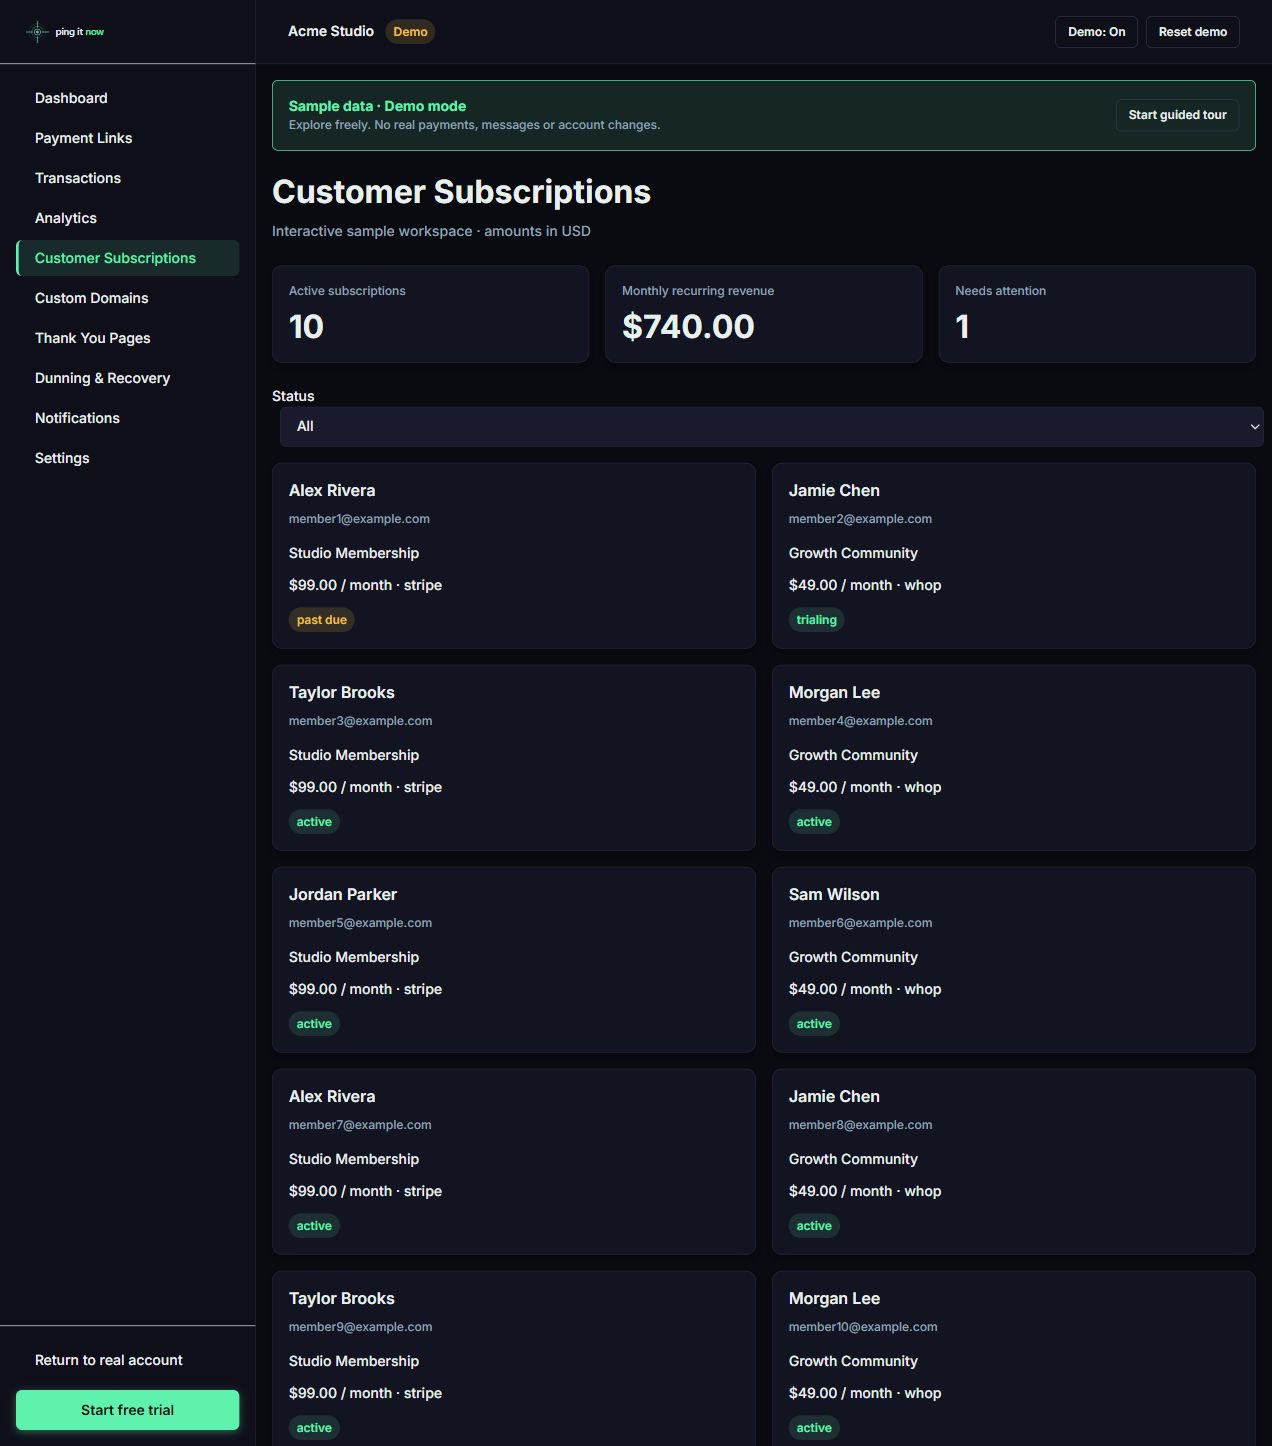 Customer subscriptions screen in Demo mode with fictional customer data · Select to enlarge
Failed-payment recovery
Payment recovery helps existing subscription customers resolve failed payments; it is separate from attribution tracking.
- Open Dunning & Recovery and its settings page.
- Under Retry Schedule, set Maximum Retries.
- Configure Retry Intervals (days after previous attempt). Use Add Retry Interval or the remove control to change the schedule.
- Review Schedule Preview. The days accumulate from one retry to the next; they are not all measured independently from the original failure.
- Under Email Notifications, choose Send dunning emails to customers when email delivery is available.
- Save the settings and monitor the next failed-payment recovery before relying on the schedule.
Recovery emails require a configured sending service and a valid customer email. When the UI reports Email delivery is not available yet, the email switch is disabled; automatic payment retries can remain available. A visible setting is not proof that email delivery is available in every environment.
The customer follows the recovery link to update payment information. Expired or canceled recovery sessions cannot be treated as a valid purchase confirmation. Verify provider retries and email delivery before relying on this flow for a live business.
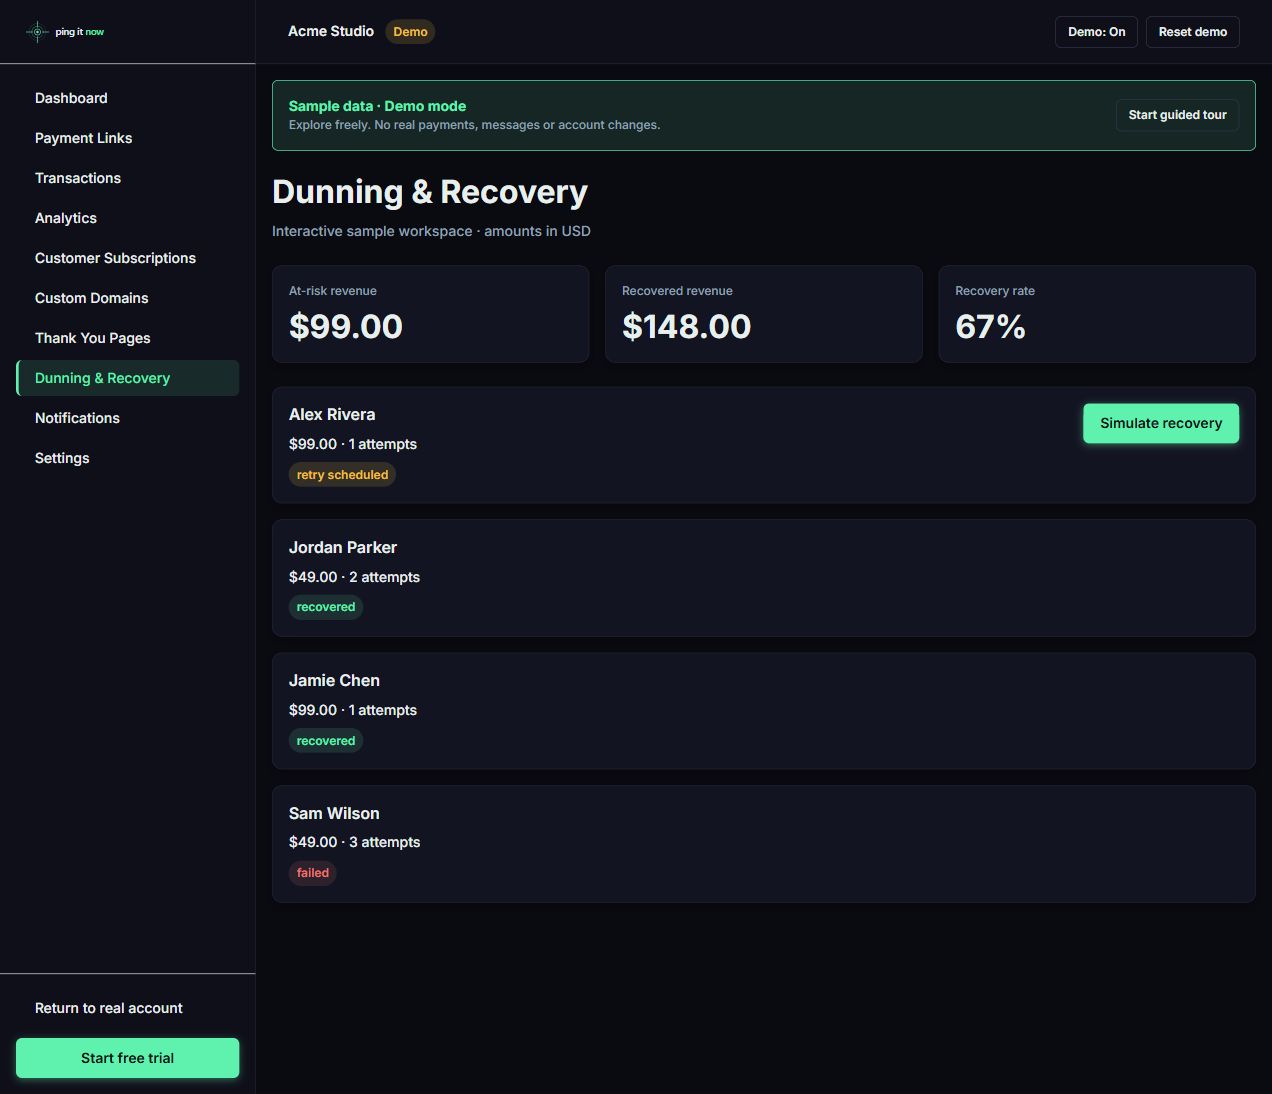 Failed-payment recovery screen in Demo mode · Select to enlarge
Troubleshooting
| Symptom | Check and next action |
|---|---|
| Create or Import asks for an integration | Connect Stripe or Whop in Settings → Integrations first |
| Stripe shows Connection Expired | Reconnect the correct Stripe account and check redirect synchronization |
| Whop connects but checkout fails | Check checkout_configuration:create and the key's business ownership |
| Whop buyer email is unavailable | Check member:email:read, Read members, and the payment's buyer data |
| Whop payments do not appear | Verify the endpoint, event selection, signing secret, and Whop webhook delivery logs |
| A domain remains Not Verified | Check the displayed DNS record, propagation, hosting ownership verification, and Verify domain again |
| The wrong tracking script loads | Check whether the payment link's domain has a script override; an override replaces the global script |
| Save rejects a tracking snippet | Use supported script tags, an approved HTTPS host, and a recognized configuration; remove noscript images and other HTML |
| Provider rejected the script | Check the provider account, script identifier, subscription status, hostname, and any custom-domain configuration |
| Script available but no conversion | Complete a verified checkout, check consent and browser blockers, and confirm provider-specific purchase-event support |
| TY works but Transactions has no payment | Check webhook delivery and payment records; a browser return alone does not prove the webhook was recorded |
| Purchase appears but campaign is missing | Inspect the provider's earlier visit tracking, identity matching, domain/cookie settings, and attribution rules |
| Arbitrary custom parameters disappear at Stripe | Do not rely on unsupported checkout parameters surviving; capture the original visit through your provider before checkout |
| Preview sends no event or never redirects | This is expected: previews disable purchase tracking and redirects |
| Editing a link reports synchronization failure | Keep the warning, fix the integration or provider issue, and review diagnostics before distributing the changed link |
| Demo has data but the real account is empty | Demo data is simulated and does not import transactions or connect your merchant accounts |
| Redirect destination or timing is wrong | Review global Redirect settings and any domain-level override |
When contacting support, include the environment, payment provider, affected link's internal name, approximate time, visible error, and whether the problem occurs in demo, preview, or a verified checkout. Share buyer information or payment references only through the appropriate private support channel; never publish API keys, secrets, or full customer URLs.
Account settings and safe operation
Open Settings → Profile to review your account details and PingItNow subscription. Cancellation of your PingItNow subscription is separate from your customers' Stripe or Whop memberships. Account deletion is destructive and affects your payment links, recorded transactions, domains, tracking configuration, and other account data; read the confirmation before proceeding.
Keep production and test environments separate. Use matching payment accounts, webhook endpoints, domains, and tracking-provider settings. Do not copy credentials from an unrelated business simply to make a test connection appear connected.
For a complete release check, verify both the browser return and the payment webhook, then confirm the event in your chosen tracking provider. This closes the loop from checkout to purchase attribution without tying your business to one tracking vendor.